From Wire to Wool, How to Wrap Armatures for Felting
Posted on
Wire Wrapping Tutorial for Needle Felted Animals
Once your armature is built, the next step is to wrap it with wool. This process is essential because bare wire is too smooth for fibres to grip, and without a base layer your sculpture can slip or lose shape. Wrapping creates a textured surface that anchors the wool securely, adds bulk where needed, and smooths out joints, so the figure feels cohesive. Think of it as preparing the skeleton with a soft layer before you begin sculpting the body. Core wool or carded sliver works best for wrapping: it’s coarse, springy, and binds tightly to wire.

Materials Needed
- Paper‑covered wire (ideal for medium projects)
- Pipe cleaners (soft, flexible, perfect for small details)
- Aluminium wire (lightweight but strong, best for larger animals)
- Floral tape or masking tape (optional, for grip and covering sharp ends)
- Core wool or carded sliver
- Felting needles and pad
- Pliers and wire cutters
Step 1: Choose Your Wire
- Paper wire: Flexible and naturally grippy, making it excellent for medium‑sized animals such as cats, foxes, or dolls. Wool adheres well to its surface.
- Pipe cleaners: Soft and fuzzy, they grip wool easily without extra wrapping. Perfect for beginners and for delicate details like tails, whiskers, fingers, or ears.
- Aluminium wire: Lightweight yet strong, ideal for larger animals that need to stand or hold dramatic poses. Because it’s smooth, it benefits from an extra layer of tape or wool to help fibres grip.
Step 2: Build the Armature
- Sketch your animal’s pose to guide proportions and ensure balance.
- Cut wire lengths for the spine, legs, tail, and head.
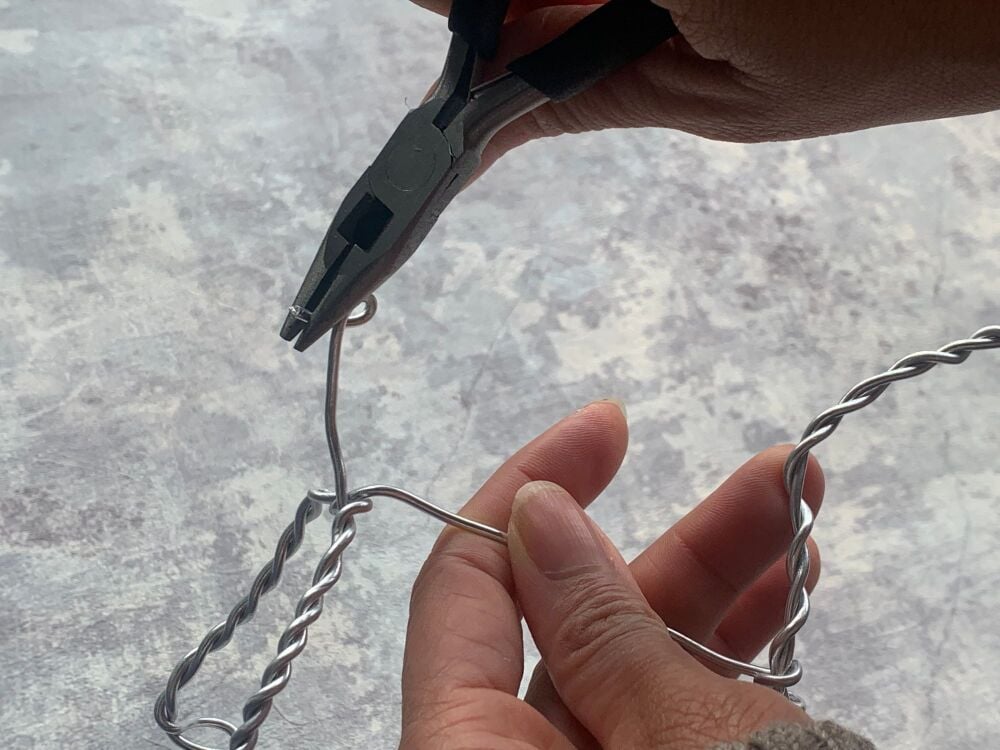
- Twist joints together firmly, so the structure is stable.
- Use pipe cleaners or fine paper wire for delicate areas such as ears, toes, or whiskers.

Step 3: Wrapping the Wire with Wool
This is the crucial step that ensures your wool grips securely and creates a smooth base for felting.
Preparing the Wool
- Tear, don’t cut: Pull off long, thin strips of core wool or carded sliver. Torn fibres mesh better than cut edges.
- Work with thin layers: Narrow wisps wrap more evenly and avoid bulky lumps.
- Use long strips: Aim for lengths that can spiral around the wire without stopping too often.
Wrapping Technique
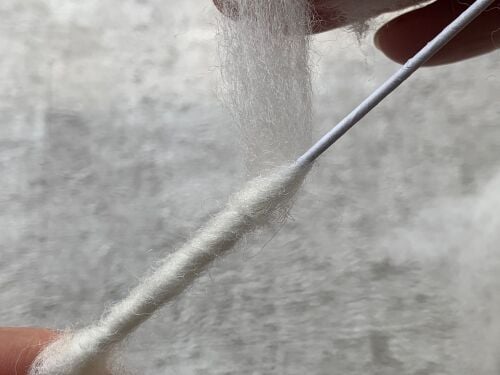
- Anchor the end: Place one end of the wool strip against the wire and hold it firmly with your thumb. Tack it lightly with a felting needle if needed.
- Spiral wrap: Wind the wool around the wire in a spiral, overlapping each turn slightly (like florist tape). Keep tension steady but not too tight—fibres should grip without thinning out.
- Double back for strength: When you reach the end of the wire, fold the wool back and wrap in the opposite direction. This locks fibres in place and evens out coverage.
- Secure with needle felting: Use shallow pokes along the wrapped wire to tack fibres down. Focus on anchoring the start and end points, plus any areas that feel loose.

Tips for Smooth Coverage
- Overlap edges to avoid gaps.
- Build gradually with multiple thin layers rather than one thick wrap.
- Blend joints: Wrap extra wool around where wires meet (like legs to spine), then needle felt firmly to secure.
- Leave wraps slightly looser around elbows, knees, or tails if you want poseable limbs.

Step 4: Add Wool Bulk
- Start with core wool to build the body.
- Wrap wool around the wire, then needle felt it in place.
- Add layers gradually, checking proportions as you go.
- Keep joints flexible if you want poseable limbs.
Step 5: Refine and Detail
- Add blended wool colours for shading and realism.
- Use pipe cleaners for tiny details like fingers, tails, or whiskers.
- Needle felt surface layers firmly for durability, but keep flexibility where needed.
Twisting Wire: What It Means for Gauge
When you twist two wires together—say, two strands of 22‑gauge wire—you increase overall thickness and strength. The gauge number itself doesn’t change, but the combined structure behaves more like a lower gauge wire: stronger and stiffer.
- Poseability decreases slightly—it holds shape better, but is harder to bend.
- Support increases, which is great for legs, spines, or standing figures.
- Bulk increases, so you’ll need more wool to cover it, and wrapping may be trickier if the twist is uneven. Two strands of 22‑gauge wire twisted together give the strength of roughly an 18‑gauge wire while keeping some flexibility. This helps the sculpture hold its shape without being too stiff to pose.
Additional Tips
- Pipe cleaners are perfect for beginners or small projects: soft, easy to bend, and naturally grippy.
- Paper‑covered wire is great for medium projects: flexible and holds wool well.
- Aluminium wire is lightweight and easy to shape, but may need doubling for strength.
- Always test your wire before committing: bend it into a rough pose and see if it holds. If it flops or feels too stiff, adjust your gauge.
- For poseable joints, avoid over‑felting around the wire. Leave some flexibility, so limbs can move without damaging the wool.
- Always cover sharp wire ends with tape or wool to prevent poking through.
Next steps see this video on wire wrapping by Felts By Philippa
