
Best Display Ideas for Felted Art: Frames, Bell Jars, Teacups, Wood, and More
Posted on
Displaying Felted Work
If you’ve ever finished a felted piece and wondered how best to display it, you’re not alone. This guide walks you through straightforward solutions using frames, natural bases, and reclaimed objects.

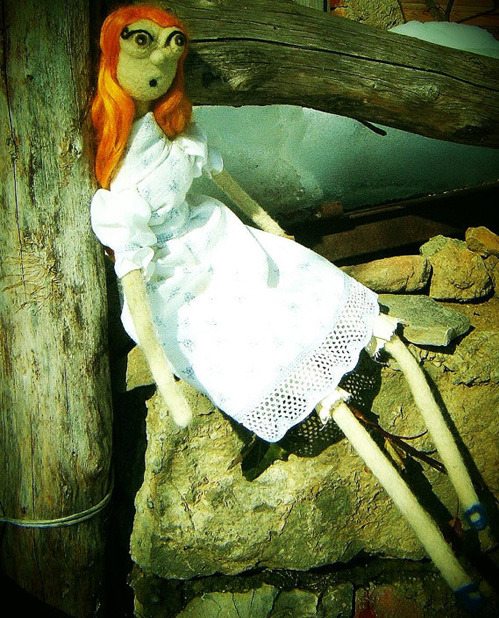
All pictures from our customer gallery thank you for sharing.
1. Framed displays
Suitable for flat felting, miniature scenes, and shallow sculptures.

- Use a shadow frame for depth.
- Mount the felt on card or fabric.
- Fix with tiny stitches or glue dots.
- Keep the background plain.
- Close the frame and check for stray fibres.
2. Key rings
Best for tiny characters, balls, hearts, and simple shapes.
- Use a split ring or lobster clasp.
- Insert a small eye pin or screw eye.
- Strengthen the attachment point with extra felting.
- Keep the design firm for daily handling.
- Present on a small card.
3. Wooden slices

Ideal for woodland themes, animals, mushrooms, and seasonal pieces.
- Choose a smooth slice.
- Add moss, felt “soil”, or keep it plain.
- Glue the felted piece securely.
- Centre the composition.
- Seal the wood if rough.
4. Wooden blocks
Good for standing sculptures or small scenes.
- Pick a stable block.
- Drill a tiny hole if you need a wire support.
- Attach with glue or a dowel.
- Keep the block plain.
- Add a small label underneath.
5. Cork bases

Lightweight and suited to tiny figures.
- Use a natural cork.
- Insert a toothpick or wire for stability.
- Keep the design small and balanced.
- Display upright or lying flat.
6. Stone bases
Works well for animals, birds, and abstract shapes.

- Select a smooth stone.
- Clean and dry it.
- Glue the felted piece firmly.
- Keep the stone colour neutral.
- Add a felt pad underneath.
7. Bell jars and terrariums
Perfect for delicate or detailed pieces.
- Select a clear jar with good visibility.
- Build a small base: moss, felt grass, or a wooden disc.
- Place the felted piece centrally.
- Avoid overcrowding.
- Close the jar.
8. Hanging displays
Ideal for mobiles, garlands, and lightweight sculptures.

- Use thin cord or fishing line.
- Add a small loop to the felted piece.
- Hang at varied lengths.
- Keep spacing even.
9. Teacups
Great for small animals, birds, mushrooms, and cosy scenes.

- Choose a sturdy cup.
- Add a base layer: felt “soil”, moss, or wool pad.
- Seat the felted piece firmly.
- Use a small amount of glue if needed.
- Present on a saucer or wooden board.
10. Sugar bowls, jam jars, tins
Good for enclosed or intimate scenes.
- Clean the container.
- Add a soft base layer.
- Place the felted piece centrally.
- Keep the composition simple.
- Ensure lids do not crush the wool.
11. Reclaimed wood
Rustic and natural.

- Pick a smooth, stable piece.
- Sand lightly if required.
- Add a felt pad or moss.
- Glue the felted piece securely.
- Keep the wood plain.
12. Reclaimed metal
Industrial or steampunk styles.
- Clean the metal.
- Check for sharp edges.
- Add a felt pad to protect the wool.
- Attach with strong adhesive.
- Keep the design minimal.
- Explore metal display ideas.
13. Small boxes or drawers
Ideal for tiny dioramas.
- Use wooden or cardboard boxes.
- Line with felt or fabric.
- Build a simple scene.
- Keep backgrounds plain.
- Close lids gently.
- Try box dioramas.
14. Ceramic tiles
Good for flat or low‑profile pieces.

- Clean the tile.
- Add a felt backing if slippery.
- Glue the felted piece in place.
- Keep tile colours neutral.
15. Teapots
Whimsical and garden‑themed.
- Remove the lid.
- Add a wool or moss base.
- Place the felted piece near the opening.
- Keep the design visible.
- Avoid overcrowding.
- Explore teapot displays.
16. Reclaimed glass
Minimal and modern.
- Use thick glass.
- Clean thoroughly.
- Add a felt pad to prevent slipping.
- Keep the composition simple.
17. Wool base
A wool base can act as its own small stage. It gives your felted piece a soft, natural platform without needing wood, stone, glass, or a container.

- Use neutral core wool.
- Fold the wool into a compact bundle.
- Needle it until firm and even.
- Shape the edges: round, oval, or softly square.
- Flatten the underside so it sits steady.
- Add light texture if it suits the piece.
- Seat the felted item gently into the top.
- Secure with a tiny dot of glue only if needed.
Final principles
Keep backgrounds simple. Avoid clutter. Choose a base that suits the scale and character of the piece. Use glue sparingly. Check stability. Let the felting be the focus.
Supplies List
Natural or reclaimed items
Glue
Next Steps
Birds of a Felter on using a wood base
Another article you may find of interest on picture pet portraits